
Making homemade dog treats for your furry friend not only ensures safe, additive-free ingredients but also keeps your pet happy and healthy. Below is a detailed guide on crafting chicken breast jerky treats using simple tools—perfect for beginners!
I. Tools Needed for Dog Treats
Microwave: The core heating tool for baking chicken breast jerky
Microwave-safe metal rack: Holds chicken slices to drain moisture during cooking
Tongs: Safely remove the heated rack to avoid burns
Meat slicer: Cuts chicken into thin slices suitable for drying
Several chicken breast slices: The main ingredient for dog treats; fresh chicken is best
II. Detailed Steps for Homemade Chicken Jerky Dog Treats
Prepare chicken breasts: Slice prepared chicken breasts crosswise into thin strips using a meat cleaver (recommended thickness: 2-3 mm; thicker slices won’t cook through, thinner ones burn easily). After slicing, thoroughly pat dry the surface moisture with your hands—this step ensures crispier treats during baking.
Arrange the slices: Spread the chicken slices evenly on the microwave’s built-in grill rack. Ensure no overlap, as this prevents uneven heating and affects the texture and outcome of the dog treats.
Initial baking: Place the rack with chicken slices into the microwave. Set the heating time to 10 minutes, select the grill mode, and start baking to begin making the dog treats.
Mid-Cook Flip and Drain: After 4 minutes, pause the microwave. Use a tool to flip each chicken slice individually. Simultaneously drain any moisture accumulated on the rack (if using a wire rack, place a tray underneath beforehand to catch drippings and prevent moisture buildup that could affect treat quality).
Finish Cooking and Cooling: Return the flipped and drained rack to the microwave. When the total cooking time reaches 8 minutes, pause the microwave, flip the chicken slices again, then return them to the microwave until the full 10 minutes are complete. Remove the cooked chicken slices and place them on a plate to air-dry naturally. A basic batch of chicken breast jerky dog treats is now ready.
III. Post-Processing and Advantages of Dog Treats
The air-dried jerky will have a golden-brown, crispy texture, fully retaining the chicken breast’s flavor. It offers a satisfying jerky-like chew that pups will absolutely adore.
You can make a large batch of these dog treats at once. After baking, place them in a small basket and sun-dry for a period (1-2 days in ample sunlight). Once completely dry, store them in airtight bags in a cool, dry, well-ventilated place to extend their shelf life. When you want to reward your furry friend or keep them entertained, simply offer a few pieces. Watching their joyful reaction will give you a real sense of accomplishment.
Compared to store-bought dog treats, homemade versions offer two distinct advantages: First, they’re cost-effective. Fresh chicken breast costs significantly less than commercial pet snacks, and making them in bulk saves money. Second, they’re safe and healthy. The entire process uses only fresh chicken breast with no additives, preservatives, or harmful substances, ensuring maximum dietary safety for your furry friend and giving you peace of mind.

-
Sale!
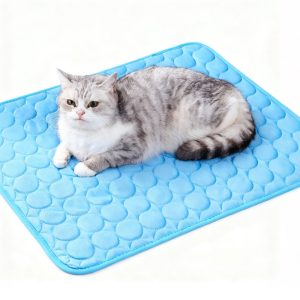
Washable Pet Cooling Pad for Cats and Dogs
Original price was: $10.99.$9.99Current price is: $9.99. This product has multiple variants. The options may be chosen on the product page -
Sale!
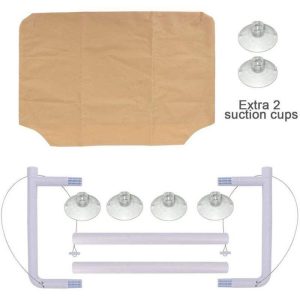
Washable Cat Window Hammock Cooling Bed
Original price was: $23.99.$22.99Current price is: $22.99. -
Sale!

Tropical Amphibian Rainforest Tank, Lizard Cage
Original price was: $38.99.$36.99Current price is: $36.99. -
Sale!
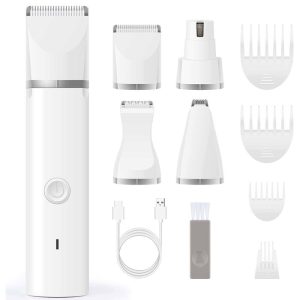
Silent 4-in-1 Waterproof Charging Dog Hair Trimmer
Original price was: $49.88.$47.99Current price is: $47.99.